

Opening a PC Case seems very simple. You may have seen numerous videos on “Unboxing a PC Case.” Some videos have the titles mentioned. People see videos and everything seems completely simple in those videos. This unboxing or opening is also simple in reality, so don’t get worried. However, there are some key points that you must consider before opening a PC Case.
You can open a PC Case without any issue, but you need to perform this activity professionally. You’ll start opening a PC Case professionally after reading this article. You can face the need to open a PC Case in 2 conditions. The first condition is when you have ordered a new PC Case, and the second one is to open a fixed PC Case again. So both tips will be shared with you. Keep reading this article entirely because you’ll find some helpful information.
How to Open a PC Case (Newly Ordered)
To open a PC Case you ordered newly. You need to follow these steps.
Unbox it From the Carton and Remove the Solution Tape
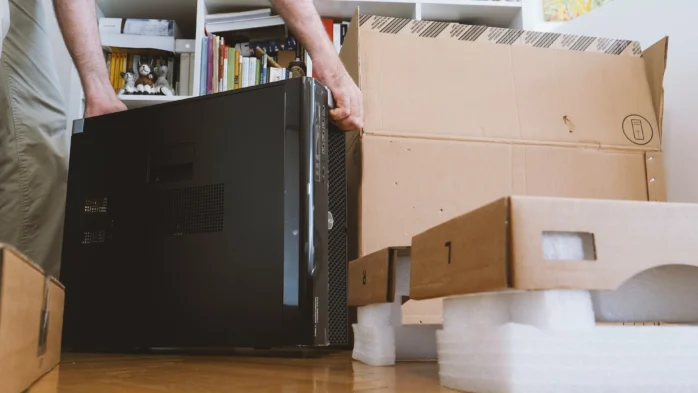
You need to follow some steps when the PC Case you ordered has been delivered to you. The first thing is to open the carton from the solution tape. I recommend using a knife to remove this tape because it makes it easier than your hands. When you try to remove the tape with your hands, you’ll damage the carton, so using a knife is better.
That was the first tip, unbox your PC Case carton with a knife. After you’ve unboxed the carton, remove the other things covering your PC Case. So when both these things are removed, you are ready to see the first view. Here is what you need to do after seeing your PC Case for the first time.
Read reviews about Unique PC Cases
Remove the plastic sheet from your PC Case. Plastic sheets are placed on the tempered glass of any PC Case. So your first task is to remove that paper and clean your PC Case. If you don’t have tempered glass, you might not see the sheet on its glass.
Open the Screws
After completely unboxing your PC Case, your next activity should be removing the screws to install your motherboard and other stuff. Then, open the screws and other stuff to install the PC components.
Install Your Motherboard
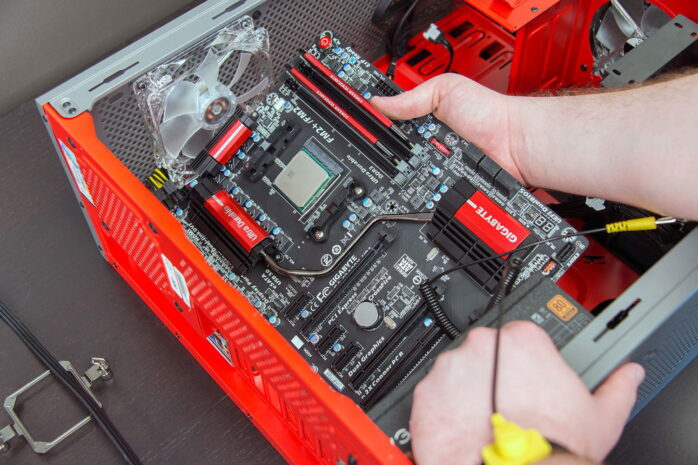
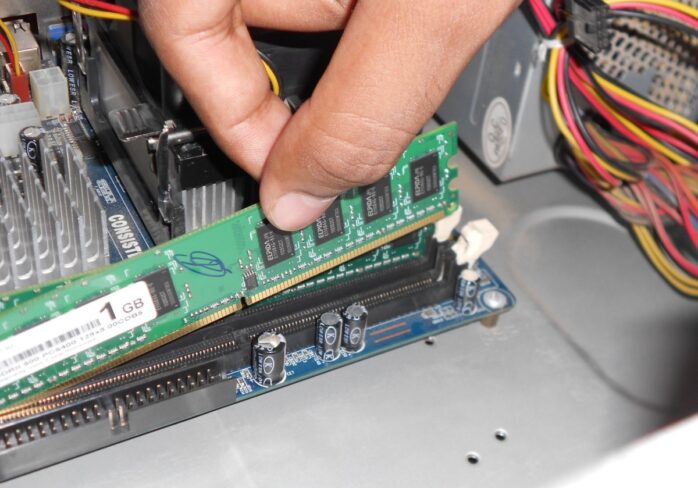
When the screws are opened, you face a massive workload at once. First, you’ve to install the motherboard in that PC Case, and filling the motherboard with the power components takes time. Next, your CPU, RAM, PSU, and Storage Devices must be installed on your motherboard. Then you’ll be able to insert the motherboard in that PC Case.
Install CPU, apply thermal paste, add CPU Cooler on your motherboard. When your CPU is installed, install the RAM you have. When this thing is done, the rest of the components include storage drives and PSU. If you have an M.2 NVMe Based SSD, you must install them at once, but if you have a standard SSD, then take this process on the last number. When all these things are installed, insert your motherboard in the PC Case and add the other stuff you’ve managed yourself.
Installing the motherboard is necessary, but it wasn’t related to our topic, but we have had to share some tips because it is an essential process. When your motherboard’s components are completely installed, you have to fit your PC Case by re-inserting the screws to their places. Then, boom, your PC Case is opened, and it’s ready to deliver the work you require.
So that’s how you can open a newly ordered PC Case. I think it’s effortless, but we have one more thing left to share. We promised two things. The first one is delivered while the second is remaining.
How to Open a PC Case (Already Installed)
We’ve mentioned the process of unboxing a PC Case and installing the components on it. Now we will discuss the 2nd topic, which is opening an already installed PC Case.

Turn OFF Your Computer
To open an already installed PC Case, you need to turn off your PC to make it ready for opening.
Remove the Cables
When you have turned off the PC, the 2nd thing is to remove the cables. Your PC Case is packed with numerous wires on the front and backside of it. To remove them one by one and put them on the other side.
Open the Screws
When the cables are removed, open the screws from every corner of your PC Case. This process doesn’t take any time compared to eliminating lines. However, opening the screws will take a little bit of your time to finish.
Remove the Inner Components
Removing the inner components is a bit tricky, but you should make a start from the PSU. First, remove the PSU and move to the other elements like graphics cards, storage drives, and RAM. When all these components are removed, you need to pick your motherboard in the last step.
Now do whatever you want to do with your PC Case. These are the 2 things we promised to deliver. Unboxing is easy, but you’ll never face the problems other people face if you follow our steps.
Conclusion
So that’s how you can open a PC Case. We’ve explained both methods. Unboxing a newly ordered PC Case and opening an already installed PC Case. So if you have got any questions, you can tell us by dropping a comment.


