

Our pets are our treasures. We make a lot of exceptions for their sake. But, it’s all worth it. They make our lives more enjoyable. Everyone who has a pet knows what we’re talking about. One of the things that help make them even more special is creating a separate door for them.
With all the love involved, it gets hard getting up whenever a pet wants to come in or go out. Yes, it is a hard duty. Most of us want to make life easier for both them and us alike. The good news is that it’s possible.
When you have a hard door, this task is an easy one. But, what happens when you have a screen door? Well, things get a little bit more complicated in that scenario. But, nothing is impossible.
Many people believe that it’s not possible to have a pet door when you have a screen door. As we said, it makes matters a little bit more complicated but it is still doable. All you need to know is how to do it the right way. Considering that you’re reading this article you probably don’t know how to do it.
Don’t worry, that’s why we’re here. Anyone who has a pet had the same idea regardless of the door. But, let’s focus on transparent ones. Some pets ignore the glass or see-through material from which doors are made. This can lead to damage or even worse, injuries. The best route to take is to avoid any of this.
All that is needed is to make a pet door for a screen door. A piece of cake if you ask us. Follow our tips carefully and soon enough you’ll share our opinion. Let’s see what we have in store for you this time around. Pets and doors. A story for eternity.
1. Do The Measurements
First thing first. Do not rush anything. Do things in order. What you need to do first is to take the measurements. When we say measurements, we are thinking about everything. Measure your pet, measure the entire screen door, and measure the size of the hole you’re about to make. That’s the only way to get your hands on a door of the proper size.
If you make them too big, you can get unwanted visitors, or have a draft. Make them small and your pet will be disappointed. The measure is everything in anything. What you need to take into account is the current size of your pet, and the amount of growth you’re expecting. With cats it’s easy, with dogs, it’s a little bit different. Some breeds can grow big fast. Take this into account.
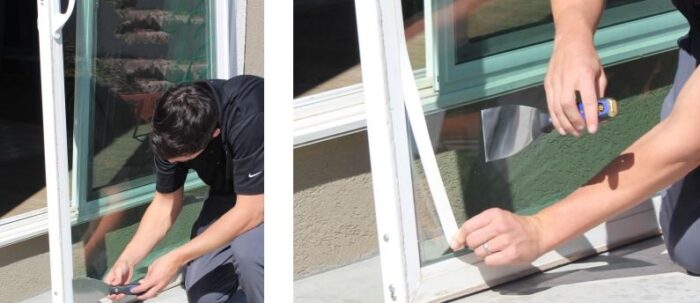
2. Start by Taking The Door Down
Many people make a mistake and start this operation before they take the door down. You can’t get the job right if you try making a hole while the door is still in position. You won’t be able to trust strong enough and you’re risking damaging both the doors and the surrounding frames.
So, before you start making the hole, make sure that you take the door down and have them on the ground. If you have proper tools in your garage it would be nice to have them attached and lying down firm. But if you don’t, just ensure that they’re on hard ground and not standing up. Take them down as if you’re trying to conquer a fortress.
3. Cut a Hole
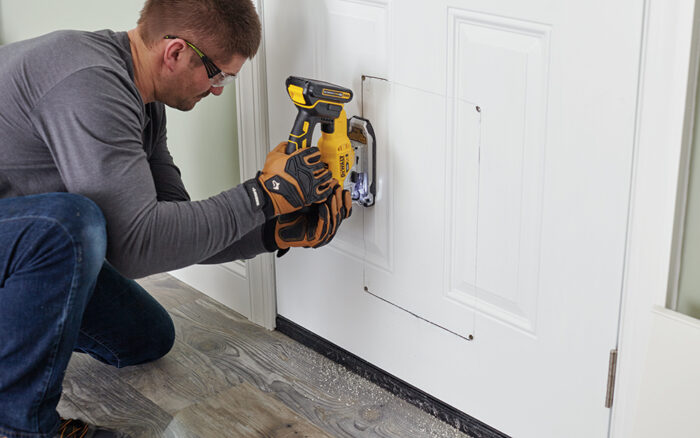
This is the main part of the operation. You’ll start it by cutting a hole in the door. What’s important here is not to take things overboard. Do not aim for the right size from the start. First, cut a smaller hole. Once you break the material for the first time, move on.
You will expand the hole with ease, but the chances are slim you’ll be able to make it smaller once you go overboard. Os, when making a hole make sure that you expand it little by little until you reach the size that fits the door of your selection. For measurement’s sake have your pet nearby. They can be of great help in this department.
4. Prepare the Field
You can have the right hole and the right door. But, what you need more than anything else is to have everything put together to ensure that you need to have all the tools, gear, and parts close to you. Once you start doing this operation there will be no stopping it.
You need to have a hole prepared, foam for stabilizing the door, the door, and enough patience to position everything perfectly. This is where you mustn’t miss a beat.
5. Put Everything Back in Place
Once the work is done, you need to put everything back in its original position. This is where you need to let the door lie down a bit, once everything is firmly in place you can start moving the big door back. This is where you need to have your pet on the side.
Do not let them use the door immediately. Ensure that the door will stand and that it can stand the test of the weight of your pet. Once the door is stable, both the big one and the smaller one, you can start using both. It is important to avoid any safety hazard which is present during the re-installation.
6. Let the Pet Play
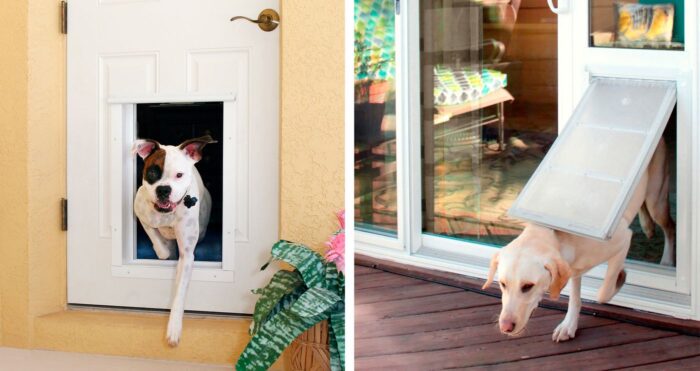
The final step is of course tied to your pet. All of this trouble was for their own sake. When you have the big door back in place, and the smaller one safe and secured, the time is right for the initial test. You need to show your pet what you have done, and teach them to use the new invention.
Our domestic animals are quite smart and they’ll grasp the advantages of pet doors in no time. All you need to do is to show them how to do it. The thrill when you no longer have to get up to let them in or out will overflow through your body when you see your pet using the new door for the first time.


