

The demand for capturing screen activities on PC keeps soaring in recent years, in that the instant content such as live streaming videos, e-lessons, demos, presentations, online meetings, etc. is leading as a trend. A professional and reliable screen recorder can undoubtedly help you record real-time messages on PCs. Among so many programs and plugins, RecordAnyVid stands out as our top picks in 2024.
Brief Information About RecordAnyVid
Available System:
Windows 10/8.1/8/7/Vista/XP (32 bit or 64 bit)
OS X 10.9 or above (macOS Sierra and macOS High Sierra)
Price:
Free trial plan
1-Year License/1 PC – $34.95
Single License/1 PC (lifetime) – $49.95
Family License/5 PCs (lifetime) – $89.95
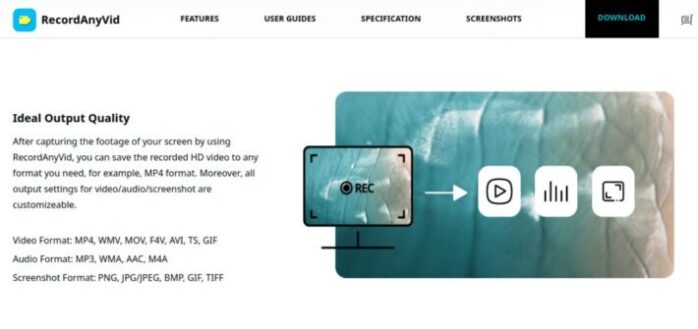
Supported Output Formats:
* Video
For Windows: WMV, MP4, MOV, F4V, AVI, TS
For Mac: MP4
* Audio
For Windows: MP3, WMA, AAC, and M4A
For Mac: M4A
* Screenshot
For Windows: PNG, JPEG/JPG, GIF, TIFF, BMP
For Mac: PNG
RecordAnyVid Highlighted Features You Should Not Miss
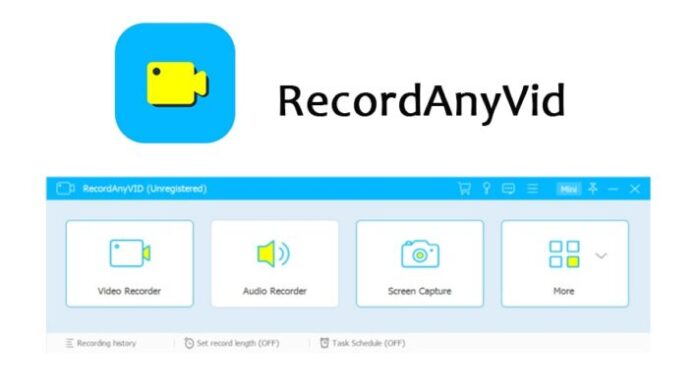
All-in-one screen recorder with comprehensive tools – video recorder, audio recorder, webcam recorder, snapshot, video editing/drawing tools is all provided inside RecordAnyVid.
Previewing mode to ensure the best recording outcomes – RecordAnyVid allows us to preview the recording process before saving, enabling users to get the most satisfying recordings.
Personalized hotkey settings available – users can set hotkeys in their preferences to control the program, making screen recording to be the most straightforward and most convenient work.
Guaranteed output quality – RecordAnyVid empowers to output the recordings with high quality as original, which ensures users better playback experience.
How to Record Any Screen with RecordAnyVid
Only five simple steps are required to capture the screen activities on your PC with RecordAnyVid.
STEP 1. Launch RecordAnyVid and select “Video Recorder”.
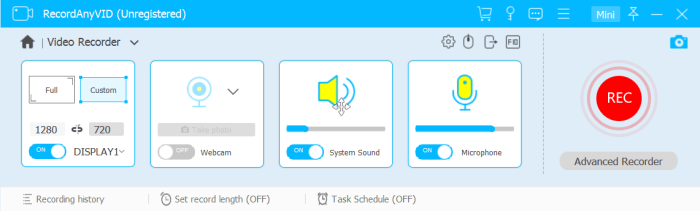
STEP 2. Customize the size of the recording area and adjust the volume to ensure an ideal playback.
STEP 3. Start recording the screen by clicking the REC button.
STEP 4. End the recording by pressing the REC button again. Then adjust the tape in the previewing window.
STEP 5. Click “Save” to output the recording with the selected video format.
An intuitive and light-weight screen recorder is beneficial to the screen capture work on PCs, and RecordAnyVid is undoubtedly an excellent choice. For more information about RecordAnyVid, visit its official webpage here. Thanks for your support.
Guide to use your cell phone recorder
One of the most used elements of a Smartphone is the microphone. Without it, our smart device would be without its primary function, which is to make calls. This time we will tell you about the voice recorder, and the practicality of uses that we give to the microphone.
It is widespread to find ourselves in the situation of not being able to use the digital keyboard of our cell phones because we are doing something else. That is why we can immediately resolve our requirements using this tiny device.
Another situation that occurs frequently is to have different pieces of paper in the wallet or briefcases with many notes, reminders, telephone numbers, and even hastily copied addresses, running the risk of poorly scoring.
Using voice notes to replace those papers is the best solution. It is simpler to press a button and start recording than to find a pencil and paper.
Options for setting up the recorder
We will explain each of the elements you will use to make a correct recording.
a) To “start Recording”, click on the “red dot”.
b) During recording, the “Pause” button is enabled. With it, you can record, take a break, and then return to resume.
c) Finally, it is only necessary to click on the small “icon in the form of a white box”.
d) Once the box is pressed, there are two options, if you are sure of the message press “SAVE,” otherwise, in “DISCARD.”
Play the recorded messages
At this point, you will learn to play all your voice notes that are recorded.
a) To “Play” the voice memo, press the “Record File List” button.
b) Tilda on the message and playback will start automatically.
c) By clicking on the “Details” icon, it displays the “Voice Quality” control.
d) In the following figure, you should always check on “High.”
e) If you check the “Recording mode” icon, you will see the options it offers you. Press one of the three alternatives, according to the environment where you are.
With these valuable tips, you can make use of this application that will make things easier when taking messages. Dare to use it!
How to make a screenshot with iPhone in simple steps
You still don’t know how to make a screenshot with the iPhone and want to learn how to do it? The short answer is: press the Start buttons and lock on your phone at the same time to take a screenshot. Unless you have an iPhone X or later, in which you will have to press the lock and volume increase buttons. For a more detailed explanation, read on!
Apple has never made taking a screenshot a problematic task. And, in doing so, a PNG file is created that can be edited and shared quickly between friends via email, text or on social networks, such as Facebook and Twitter.
You can even send screenshots to technical support for further analysis, or use them to make a guide that collects various tips and tricks of Pokémon Go. Regardless of the reasoning, here is everything you need to know.
Are you a macOS user? If so, we also have a complete guide on how to take a screenshot on a Mac.
How to make a screenshot with iPhone
Step 1: Locate the necessary buttons: you will want to locate the Start button and the Lock button on your iPhone. Most likely, you probably know where they are because they are the only physical buttons on the phone. If not, do not worry. The Start button is circular and appears on the front of the phone, directly below the screen. The Start button has occupied the same property on all iPhone models. The Lock button, also known as the sleep/activation button, is located on the right side of your phone unless you’re using an iPhone 6 or later. Otherwise, it is located on the top of your device.
Step 2: Take the screenshot: Press the Start and Sleep buttons at the same time when you see what you want to capture. The iPhone screen will flash briefly blank, indicating that the screenshot worked correctly. You will also hear a weak shutter noise, as long as your device is not in silent mode.
If you press the Sleep button a fraction of a second before the Start button, your iPhone’s screen will turn off. If you press and hold the Start button for too long, then Siri will be activated. Timing is everything here, so if this is the first time you do it, you may have to try a few times to get the correct time.
Step 3: Edit the screenshots: once you’ve made the screenshot, a small preview will appear in the lower-left corner of the screen. This preview will automatically disappear in about five seconds, but you can also slide it to the left to discard it. By touching the thumbnail, you can crop or enlarge the image, or mark it with a pencil and various shapes. When you have finished editing, select Done in the upper left corner and choose whether you want to save the new image or delete it. If you take a screenshot, touch the preview and select Done. You can also select Remove screenshots and quickly cancel a screenshot that you did not intend to take, which is very convenient.
Step 4: Watch and share the screenshots: once captured, the st iPhone will automatically save the screenshot directly to the camera roll (also known as the Photos app). Simply tap the Photos app, which is represented by a multicolored sunflower icon, and scroll to the bottom of the photostream to see the recently captured screenshots. Then, touch the thumbnail to enlarge these images, or the box in the lower-left corner while viewing the icon to access the options to share the screenshot through text, email, AirDrop, Facebook, Twitter, and other services.


