

A good manicure can make you feel put together and polished, even if everything else in your life is a mess. But unless you’re willing to drop some serious cash at a salon, getting that professional look can be tough to achieve. Never fear! With these easy tips, you can give yourself a salon-quality manicure right at home. All you need is a little time, patience, and the right supplies. So break out the nail polish and get ready to give yourself a mani that will make all your friends jealous.
What You’ll Need
-A bowl of warm water
-A hand towel
-Cotton balls or pads
-Nail clippers
-Nail file
-Cuticle pusher
-Orange stick
-Base coat
-Polish in your desired color(s)
-Top coat
-Nail polish remover (for any mistakes)
1. Prep Your Nails
If you want your nails to look their best, you need to prep them before you start your manicure. Here are a few tips on how to prep your nails for the perfect at-home manicure:
Start by trimming your nails. Use a nail clipper or scissors to trim them to the desired length. If you’re not sure what length to go for, err on the side of shorter rather than longer.
Next, file your nails. Use a nail file to shape them into the desired shape. Again, if you’re not sure what shape to go for, try a classic round or oval shape.
Once your nails are trimmed and filed, it’s time to wash your hands. This will help remove any dirt or oil from your nails that could interfere with the manicure process.
Finally, push back your cuticles. Gently push back your cuticles with a pusher or an orange stick wrapped in cotton wool. This will help create a clean canvas for your manicure.
2. Choose Your Color
The sky is the limit in terms of color choice! From classic reds and pinks to trendy neons and metallics, there are endless possibilities. Not sure where to start? Here are a few tips: You should also need to know the best nail wrap brands in order to achieve this.
-If you’re going for a bold look, start with a neon or metallic shade. These colors are perfect for making a statement and really stand out.
-If you’re looking for something more subdued, go for a classic red or pink. These timeless shades never go out of style and always look chic.
-Don’t be afraid to mix it up! Try pairing two different colors together for a unique twist on the traditional manicure.
3. The Base Coat
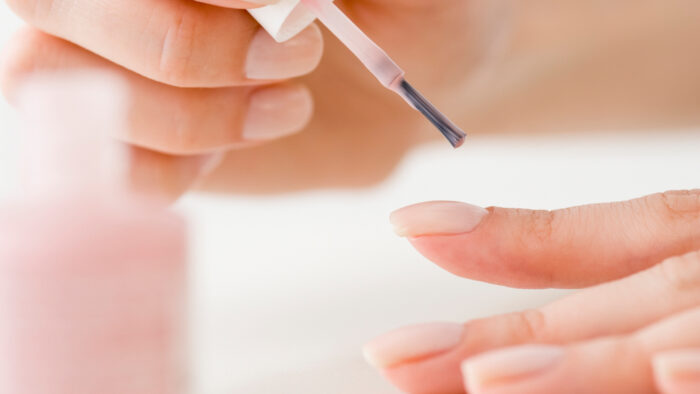
The base coat is the first step in applying a professional-looking manicure at home. It helps to create a smooth surface for the polish and prevents nails from staining. A good base coat should be applied in a thin layer and allowed to dry completely before applying the color polish. You can use Candy Coat.
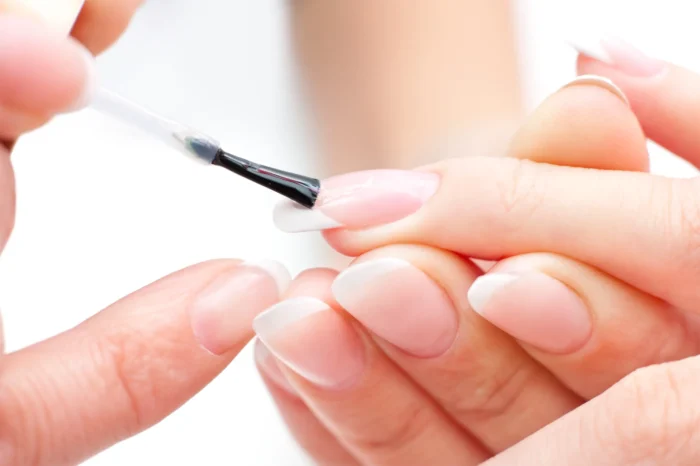
4. The First Layer of Color
Once you’ve found the perfect shade, it’s time to start painting! To get an even coat of color, it’s important to use thin layers. Start with a very small amount of polish on the brush, and then paint each nail in one stroke from the base to the tip. If you notice any streaks, go back over them with another layer of polish. Once you’re happy with the coverage, let the first layer dry for a few minutes before moving on to the next step.
5. The Second Layer of Color
If you’re looking to add a little more interest to your at-home manicure, consider adding a second layer of color. This can be done by simply painting your nails with a base coat of one color, followed by a top coat of another shade. For example, you could start with a nude base and then add a pop of color with a brighter shade on top. Or, you could go for a more subtle look by choosing two similar colors.
Once both layers of color are dry, finish off your manicure with a top coat of polish. This will help protect your nails and make them last longer. And that’s it! You’ve now got a beautiful two-toned manicure that you can show off to all your friends.
6. The Top Coat
A top coat is a clear or colored lacquer that is applied over your base coat and polish. It helps protect your manicure from chips, scratches, and fading. A good top coat will also make your manicure last longer. Here are some tips for choosing and using a top coat:
-Choose a top coat that is compatible with your base coat and polish. Some top coats can be used with any type of polish, while others are specifically formulated for use with gel or shellac polishes.
-Be sure to seal the edges of your nails when applying the top coat. This will help prevent chipping and peeling.
-If you are using a colorless top coat, you can apply it over any color of polish to give it a glossy finish.
Different types of manicures
There are a few different types of manicures to choose from, and each has its own benefits. Here are some of the most popular:
- American Manicure: One of the most popular types of manicures, it is perfect for those who want a natural look. It uses pale colors and usually doesn’t involve any intricate designs.
- A classic choice, the French Manicure is perfect for special occasions or everyday wear. It uses white tips and usually has a bit more polish than the previous type.
- If you’re looking for a long-lasting manicure, the gel is the way to go. The gel polish is cured under UV light, making it last much longer than traditional nail polish.
- Shellac Manicure: Similar to a gel manicure, shellac also uses UV light to cure the polish. However, shellac polish is thinner and less likely to chip than gel polish.
- Acrylic Manicure is perfect for those who want long, strong nails. This type of mani involves adding fake nails made from acrylics onto your natural nails.
Conclusion
DIY manicures can be a great way to save money and have some fun experimenting with different nail designs. However, if you’re new to the world of at-home manicures, it’s important to know a few tips and tricks before getting started. With our beginner’s guide to DIY manicures, you’ll be ready to create beautiful nails in no time!


